Setting up Asterisk for Raspberry Pi with Cisco 7940 phones and 3g modem
- Details
- Category: Completed
- Published on Friday, 21 November 2014 17:09
 4 phone Cisco/Asterix setupThe place where I work, decided to change IP phones. Therefore they changed all their old Cisco 7940/7960 phones in favor of Microsoft Lync. This ment the container was full of really nice phones, and I decided to put them to use - while keeping costs as low as possible.
These days, VoIp service is fairly costly if you do not need 25+phones connected. On the other hand,mobile plans being cheap and almost flatrate (at least in Denmark). Therefore I decided to connect a 3g modem as connon phone-trunk for the Cisco Phones.
![]() AsterixThe most profficient open source VoIP PBX is Asterisk. It has millions of users and is well documented. Therefore it was chosen as the weapon of choice to control the phones.
AsterixThe most profficient open source VoIP PBX is Asterisk. It has millions of users and is well documented. Therefore it was chosen as the weapon of choice to control the phones.
As I merely have 6 Cisco phones, i have opted to use the RaspBerry Pi to host the Asterisk server. As it turned out, there is an entire distro for this purpose - expecially tailored for the Raspberry Pi. It is said to be stretched on resources if handling more than 3 concurrent connections at a time, but I am hardly ever going to need that.
In order to complete the project, I will therefore us:
- 6 * Cisco Ip Phone 7940 Series (scavenged from container)
- 1 * Raspberry Pi B+ (leftover from an old project)
- 1 * 8Gb memory card, Class 4 (found in obsolete android phone)
- 1 * Huawei E1550 3g modem (found while dumpster diving)
- 1 * Old Allnet Telesyn FS708 100/10 Mbit Ethernet Switch (also found in company dumpster)
(yeah, I know. In the image above, there are only 4 phones - but I ran out of LAN cables. They do, however all work!)
The Cisco Phones do support POE, so it would be possible to power them over the ethernet cable. I could, however, not find a POE enabled switch, so I had to use the normal 48v transformers.
Installing and configuring RasPBX basics
(note that guide assumes you are an experienced linux user. Note that you should secure your system afterwards.)
- Download the image from this site
- Write it to SD card
(dd bs=4m if=pbxfile.img of=/dev/sdx) - Insert SD into Raspberry Pi and Boot.
- Ssh to raspberry using
sshroot@raspbx.local(or to it's dhcp ip) - password will be "raspberry" - Set static ip using normal means(edit /etc/network/interfaces) - note that throughout the example, my Raspberry Pi IP was:
192.168.3.9 - Configure timezone:
configure-timezone - Reconfigure locales (though only idiots would ever use any language besides english on a computer voluntary, you need to set the locale to get time right on phones due to timezones) -
dpkg reconfigure-locales - Finally expand the filesystem to use whole SD card. RasPBX partition only fills 4GB nomatter the SD card size. You can correct this running
raspi-configAfter this the Raspberry will reboot.
... Congrats. You have now transformed your Raspberry Pi to a RasPbx!
Setting up the cisco phones for use with asterisk
The CISCO 7940 retrieves its settings from the PBX server using TFTP. Therefore it has to be set up to retrieve the settings from the RasPBX.
First connect the phone to the same lan as your RasPbx. It is assumed that this net has a functioning dhcp server.
- Turn on phone
- Press settings (checkmark icon)
- Scroll down and press "Unlock Config" - password is "cisco"
- Scroll up and find "Network Configuration"
- Scroll down and set "Alternate TFTP" to "YES"
- Choose "TFTP Server" and set the address to the Raspberry Pi's address.
- Press "Back" untill you are at the mainscreen.
- Remove power from phone. Turn it upside down and record the MAC address. It will be 12 characters written on the center label on the bottom of the phone.
Creating and uploading config files for the phones
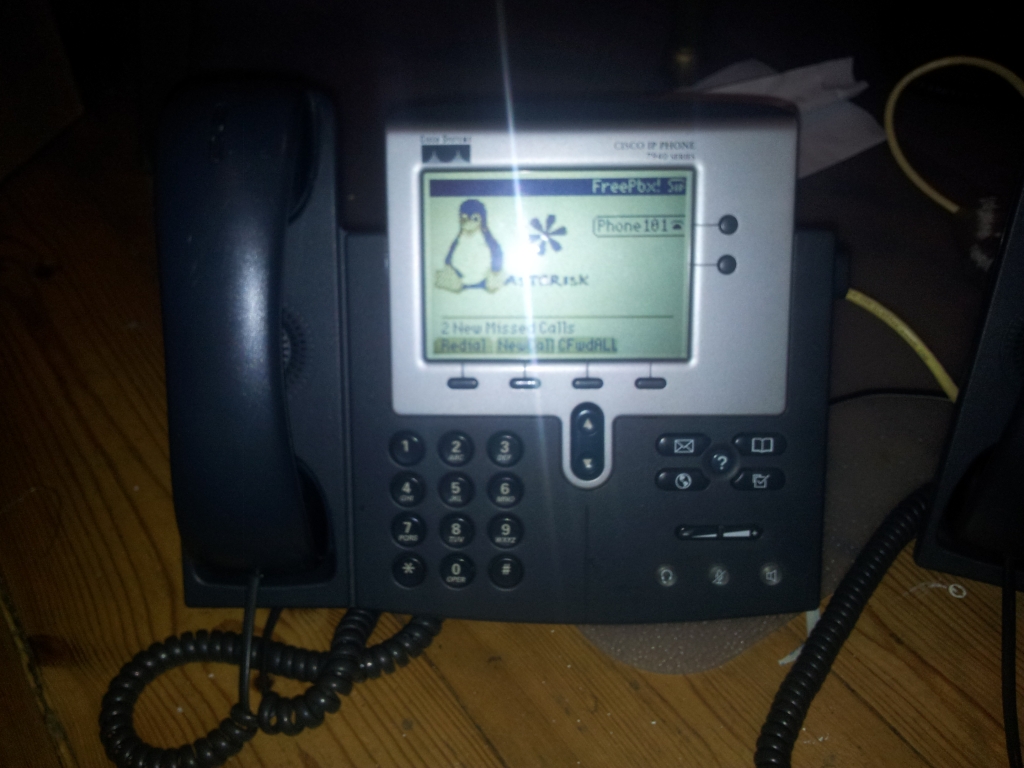 Citrix 7940 with Asterix software and custom logoFirst download the sample settings files from HERE
The archive contain the following:
- /firmware directory
DIALPLAN.DAT - contains dial-out patterns to make the phone behave in a special way. For now just leave it. you can change it later if need be.OS79XX.TXT - just contains the pattern of firmwarename the phone needs to load, in case of multiple different kinds of phones are retrieving their settings from the server. It points to the next 4 files.P03-8-12-00.loads - firmware fileP03-8-12-00.sb2 - firmware fileP03-8-12-00.bin - firmware fileP03-08-12-00.sbn - firmware fileRINGLIST.DAT - Contains names of files containing ringtones to be loaded - this refers the next two files.ringer1.pcm - Contains ringtones.ringer2.pcm - Contains ringtones.SIPDefaults.cnf - Contains all information that is common for all connected ipphones. In this file you need to set:"proxy1_address" to the ip of your RasPbx, that your set earlier on"services_url"should be prefixed withthe ip of your RasPbx."directory_url" should be prefixed with the ip of your RasPbx.- "logo_url" should be prefixed with the ip of your RasPbx.
leave other settings alone for now. They can be changed when you have got everything working.- SIPXXXXXXXXXXXX.cnf - The setting file for a specific phone.
You should create one for each phone, replacing XXXXXXXXXXXX with the macnumber of the phone, that you recorded earlier. For instance, two of my phones (both now discarded), had the MAC 000DED088F45, and 000DED22EA5E hence I had a file called SIP000DED088F45.cnf and another SIP000DED22EA5E.cnf Both are included in the zip.The Phone has two (or if you have a 7960, six) lines. This means - how many connections to other phones you can have at a time. Normally you will only use one, but in callcenters you can have many going at any one time.- Note the following settings.
- I had my phones set to have local extensions 201-206. The "line1_name" should be set to the actual phone extension number.
- line2_authname should also be set to the extension number.
- line1_shortname should be set to something meaning full. Could be "Office1" or whoever owns the phone. Remember this name. It must match settings set later
- line1_displayname. If both set, you can call and answer both lines. This variable is the text written on the physical phone next to each connection. I surgest you set it to the extension number you want. If only using one line per phone (which you should in this first attept), leave it at the phone extension number.
- line1_password. The phones are registering with the PBX using a password. It must contain both letters and numbers.
- /other directory
- contains three files:
- asterisk_tux1.bmp A new image file for the phone. If you want, you can make your own. The cisco phone utilizes 4 colors, and you can make your own using these colors
- Black: 000000
- White: FFFFFF
- Light Gray: #404040
- Dark Gray: #808080
- cisco_service_menu.xml: The 7940 has the ability to query online services. For this simple setup we will simply put a static file on the Raspberry Pi that will be processed. It does, however have the power to do much more advanced queries.
- cisco_telephone_directory.xml: The phone can access an online phonenumber directory. While this should probably be generated dynamically, we will just put this on the Raspberry Pi as a static file.
- asterisk_tux1.bmp A new image file for the phone. If you want, you can make your own. The cisco phone utilizes 4 colors, and you can make your own using these colors
- contains three files:
When you are done configuring the files, you should fire up an SFTP client and connect to the RasPBX (FileZilla does nicely - use File->Site Manager).
- Credendials will be:
login:root, password: raspberry - Upload everything from /firmware into /tftpboot
- Upload everything from /other into /var/www/html
You can get more information about the different files and formats HERE. It allso includes information on how to set the phonedirectory. To do something usefull with the service xml, read HERE.
If you have not done something wrong, you should now get a nice Linux/Asterix logo (asterix_tux1.bmp) when turning on the phones (like the image at the beginning of this section)
Configuring FreePbx for calling between internal phones.
Now we need to set up the phones form internal calling. If the phones can all call each other, both the server and the phones are likely correctly configured.
- Log into FreePbx Administration, by going to http://RasPbxIp - login: admin, password: admin
- Goto Application->Extensions
- Create one "Generic SIP Device" extension for each of your phones. The only thing you need to set is:
- "User Extension" - this should be set to the phones extension number. For me this would be between 201 and 206. should match "line1_name" in SIPXXXXXXXXXXXX.cnf
- Display Name - Should be the same as was set in the line1_shortname attribute in the SIPXXXXXXXXXXXX.cnf file. You know, the name of whoever owns this phone - or where it is.
- SIP Alias - should also be the extension number.
- secret - must be the same as "line1_password" in the SIPXXXXXXXXXXXX.cnf
- Press "Submit"
- ... Do this for every phone extension you need and afterwards press the red "Apply Config" button. Asterix will not load your new configs before you do this!
- Remove power from all phones and plug them in again.
You should now be able to call between extensions by pressing "NewCall", writing the extension you wish to call - and pressing "Dial".
Note that on the display of the phone, you will have an "x" next to the phone icon if your phone is not registered correctly with the server. This will not be there if Asterix thinks it is configured correctly.
Setting up the 3g dongle.
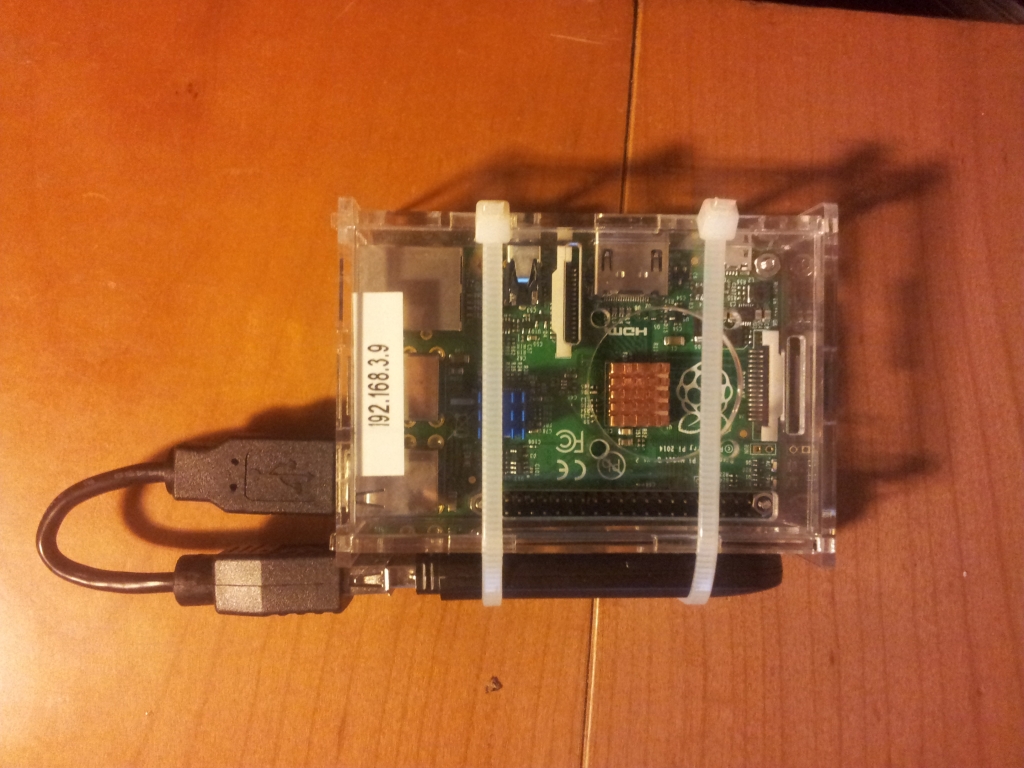 RasPbx with 3g dongle installedNow first of all. Note that RasPBX gets its 3g phone capabllities through a module called Chan_dongle. You need to have an unlocked dongle. You can check if your dongle is supported HERE
I used a Huawei E1550, and it worked just fine. There should however be problems with certain firmware versions.
Now, what is NOT common knowledge is, that even though your 3g dongle is unlocked, it may still be "Voice Locked". Many such dongles are, if they are sold with mobile internet.
It is fairly difficult to figure out if your dontle is Voice Locked. I have only been able to do it using windows. First I had to install all moden drivers for the dongle, and thereafter run the program "DC-UNLOCKER" (find the site HERE).
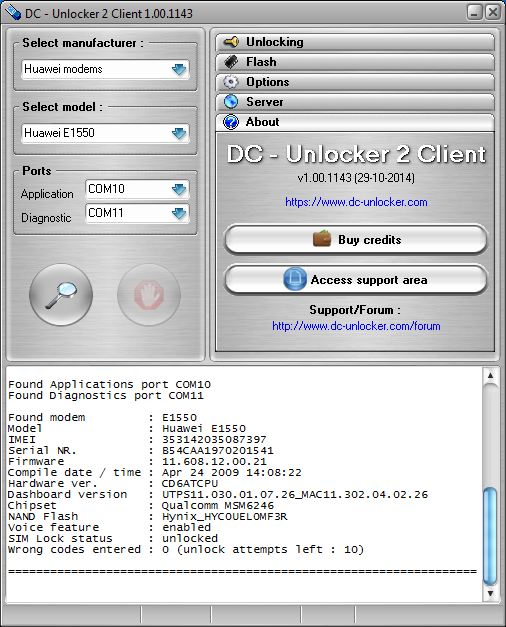 Unlocked 3g dongle - DC UNLOCKERThis program will tell you if your modem is voicelocked. It is important you do this! If you dongle is sim - or voice locked, this program can unlock it. It does cost a few Euros though. Removing voice lock from my dongle was 4 Euros.
Now. DO CHECK THIS!!!
If the modem is voice locked, you will not get an error code telling you this. There will be nothing in the logs. Nothing! When trying to call out, and you will simply get a voice telling you to check the number. This took me DAYS to figure out. So Check!!!
After this, you will need to:
- ssh into the RasPBX and write: install-dongle
- It will ask you about your phonenumber. Write it in international format with countrycode prefix. If I was in denmark and had the number 20202020, and my countrycode was 45, it would be +4520202020
- You will also be asked if you want to have a page to send sms from... do it if you want. At the least, this will help you test if the modem works throughchan_dongle.
- After running this script do a reboot, as many modems is only properly initialized in chan_dongle at startup. (because they are designed for windows and need usb_modeswitch to function propery.
After this, we need to set up a "Trunk". In Asterix a trunk is phone gateway
- log into FreePbx web interface again, go to:
- Connectivity -> Trunks -> "Add Custum Trunk".
- The only thing you should set in the custom trunk is:
- Custom Dial String should be set to
dongle/dongle0/$OUTNUM$ This allows Asterix to know which dongle you are using if you have several.
- Custom Dial String should be set to
- Press the red button with "Apply Config"
After this, we need to set up an inbound and outbound rute. Basically, this is connecting the extensions to the trunk.
- In FreePbx:
- Go to Connectivity -> Inbound Routes.
- Set a description for the route in the "description" field
- in the DID field, write the exact same number as you did in the install script, in internation notation. (ours would be +4520202020)
- In "Destination" chose one of your extensions. Should you need the ingoing calls to do a complex ringing style you can figure it out later. For now, just let it ring an extension.
- Press Submit
- Go go Connectivity -> Outbound
- Set a Route Name
- In "Dial patterns that will use this Route" set a "." in the "match pattern" section. This is important. Only dialpatterns matching the pattern will be let out through the outbound route. the "'." means "everything matches". If you want advanced dialpatterns. Do it later.
- In "Trunk Sequence for Matched Routes", choose your own trunk.
- Press "Submit"
- Go to Connectivity -> Inbound Routes.
- Press the red "Apply Config" button.
Note: If something goes wrong in this section, consult THIS LINK.
... Test your system and see if you can call the outside world. If you are lucky, you should now have a funcitoning system. If something does not work, check the logfiles that can be found under Reports -> Asterix Logfiles