Rooting a cheap chinese tablet (Denver TAD-70111)
- Details
- Category: Completed
- Published on Thursday, 20 November 2014 17:31
 Denver TAD_70111A few days ago i bought a cheap android tablet. It was a "Denver TAD 70111". It sported 4gb of hdd, 512mb RAM as well as a 7 inch screen and Wifi connection. All for the price of DKK300 (aprox $50).
I bought one and tested it. I was quite impressed with the amount of tablet you got for the money. Only problem was that I could not get the adb-link to function properly.
Therefore I could not install homebrew software or even gain root.
Denver (which is a Danish company) does not have any hardware development themselves, so the tablet was likely a cheap rebranded chinese version. In any case Denver was not inclined to help me troubleshoot the adb link.
So I began trying...
Well, in Windows not much luck. It was next to impossible to find the driver. Especially when you have not go a clue as to what brand of tablet you really have.
So I tried Ubuntu....
Well, the first step is to figure out what kind of device you have
- Enable USB debugging on device
- To get the vendorid using lsusb command and dmesg.
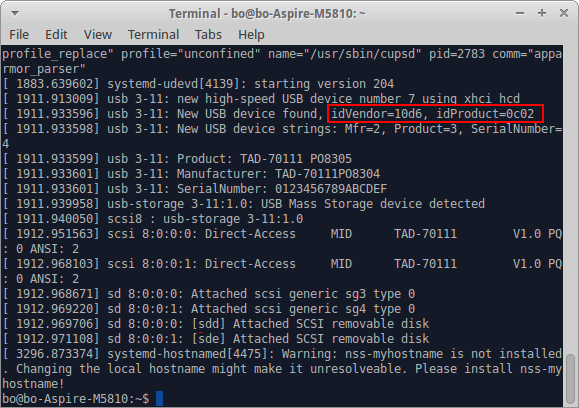 Device IdIn my case, I did not get anything using lsusb, but got a it from dmesg (see screenshot). Googling a bit revealed that the vendorcode "10d6" belongs to "Actions Semiconductor Co. Ltd" - which is one of the companies making these cheap tablets.
Next step is to install the Android SDK, as described here: Go here!
The odds of Linux not being able to communicate with your device is close to nill. It probably just won't.
Remember to add rule to your udev file and enforce it like this:
sudo nano /etc/udev/rules.d/51-android.rules
SUBSYSTEM=="usb", ATTR{idVendor}=="18d1", MODE="0666"
after this run the following commands in order to reload udev rules
sudo udevadm control --reload-rules
sudo service udev restart
After this, ubuntu should list the device if you do a lsusb
The android environment, does, however, need to access it as well.
Therefore add the vendorid and the productid on a line in the android debug bridge usb permission file like this:
sudo nano /home/(username)/.android/adb_usb.ini or sudo gedit /home/(username)/.android/adb_usb.ini
0x10d6
0x0c02
There may be a few others in the file. Googles vendorid is likely to be there intially.
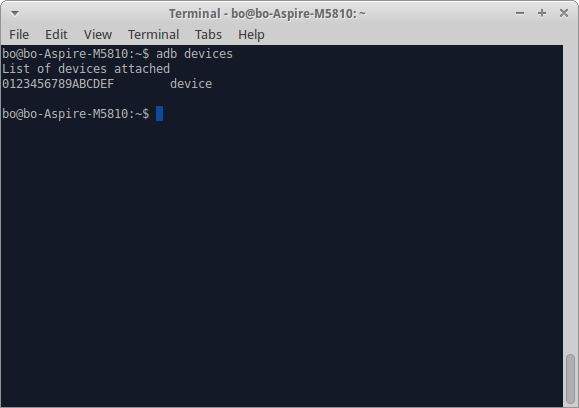
After this, you can run:
adb services
This gave me the answer:
 Device Name
List of devices attached
0123456789ABCDEF device
- adb Install Superuser.apk
- adb install Root\ Checker.apk
- adb push busybox /sdcard/
- adb push su /sdcard/
- mount -o remount,rw /system
- mv /system/xbin/su /system/xbin/oldsu
- cp /sdcard/busybox /system/bin/busybox
- cp /sdcard/su /system/bin/su
- chmod 06755 /system/bin/su
- chmod 0755 /system/bin/busybox
- ln -s /system/bin/su /system/xbin/su
- rm /sdcard/su
- rm /sdcard/busybox
- exit su (may say something about a bad number
- exit
- adb reboot
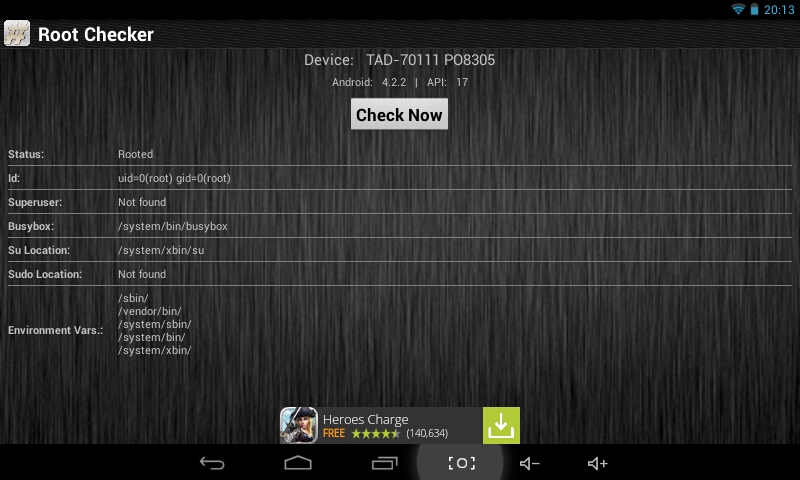 Finally RootedYou can verify that you have root using the previously installed rootchecker as shown in the image.