Waterproofing a tent groundsheet using beewax
- Details
- Category: Completed
- Published on Sunday, 09 October 2011 11:31
Why waterproof a groundsheet this way?
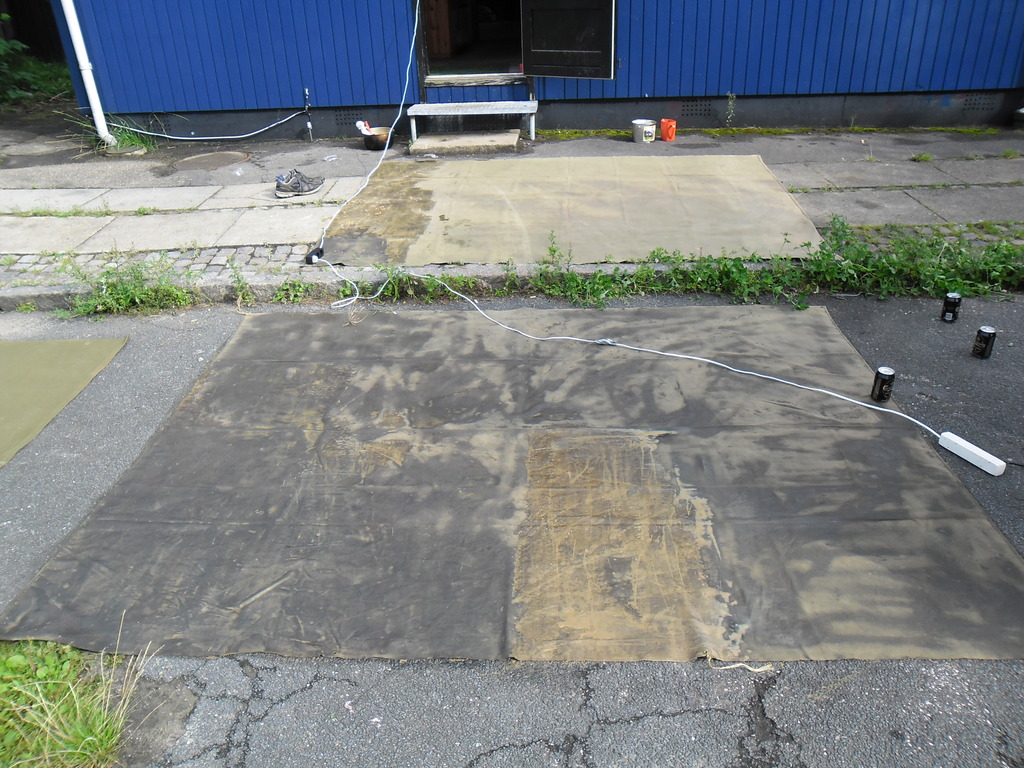
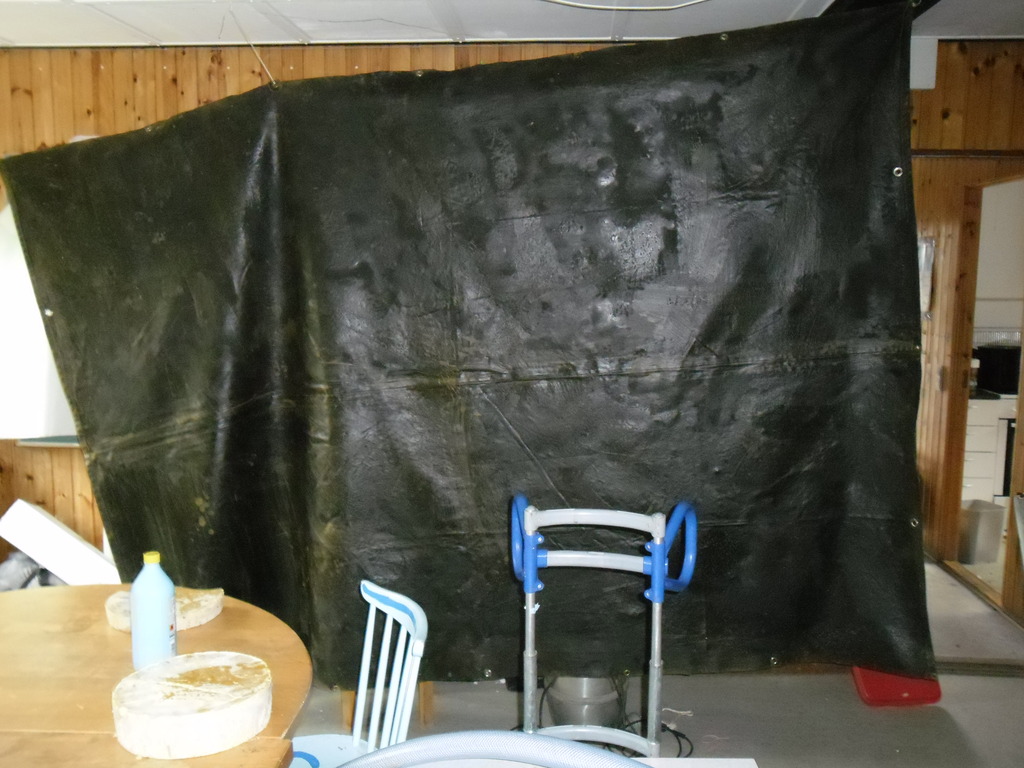 Waterproff groundsheet Waterproff groundsheet |
I and some other scouts have competed in the "MillRiver Race" (dk:Mølleåsejladsen) for so many years that we needed to try somethin new. The Mill River Race is a competition in which a scout should build his/hers own raft in two hours using only a tarp, some rope and whatever they can find in the forest. Thereafter they will sail the raft 10km to the finishing line.
These days, scouts use modern thick truck tarps that slide easily through the water, but as it was the events 50 year aniversory this year, we thought we would do something special. See, 50 years ago they did not have good plastic tarps and so used groundsheets for tents that had been waxed.
Therefore we set out to do the same.
The secret recipe
It has been very difficult to figure out how to do this, as the art has almost been lost and there really are not any one to ask how to do it. Either the ones that did it has died or else they really cannot remember.
Well, We did find a recipy that would almost do the trick. It seems that the old Saxons waterproffed their tents by smearing them with a mixture of animal oil, and beeswax. Thereafter they made a controlled fire inside the tent using tar-rich wood. The heat would melt the mixture and add soot particles and tar to it. The result being very waterproof and well suited to harsh weather.
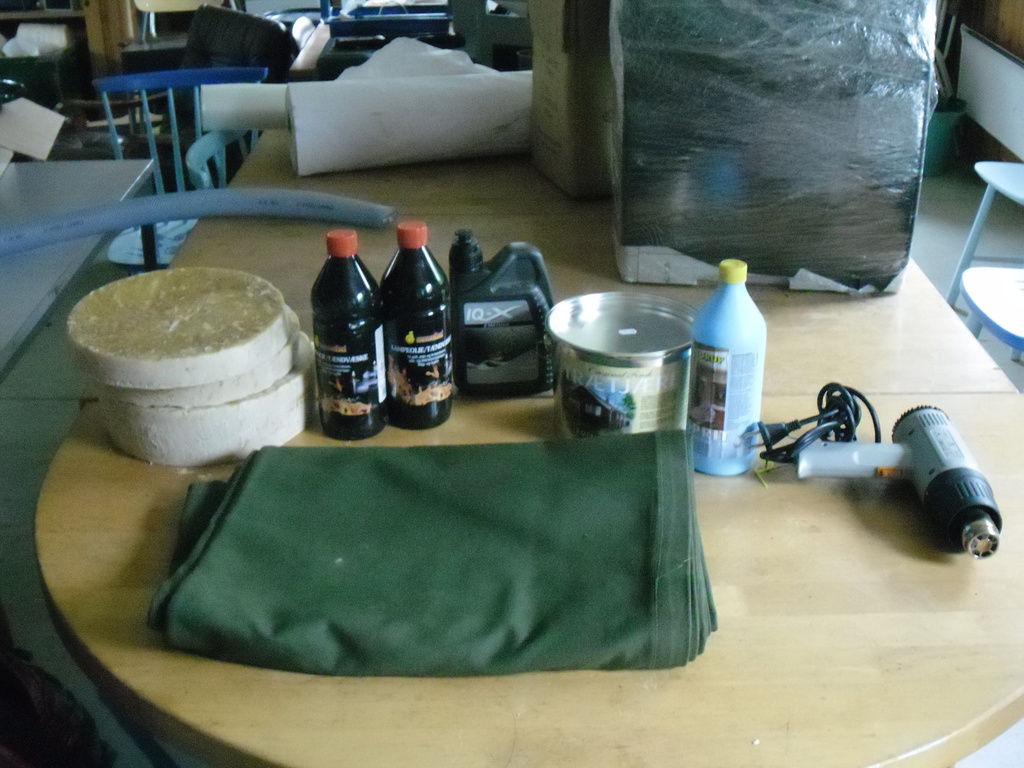 Materials Needed Materials Needed |
As out goal was to compete using materials they had 50 years ago, we modified the different solutions we heard about, substituting animal oil for mineral and using processed tar instead of fire and wood.
The theory is that the beeswax on its own will crack when dried, and therefore thin oil has to be added in order to dillute and soften it. The tar keeps thing from rotting and is extremely sticky and good at keeping stuff together together with thicker oil
For one ground sheet (3,5 * 4,4 meters) you need
- 3 kg pure beewax
- 1.2 ltr paraffinoil (lamp oil can be used instead as long as it is mineral based)
- 0.5 ltr mineral oil of somekind (we used 2-stroke engine oil)
- 0.4 ltr virgin tree-tar.
- 3 large pots (where one will fit inside one of the others)
- 2 quality heatguns (cheap ones will die quickly!)
- Cut pibe, 13mm (dk: hugge pibe) for making holes in the sides
- metal rings riveting tool (dk: værktøj til at banke sejlringe i)
- metal rings (dk: sejlringe), the enforced holes to put into the groundsheet, 14mm
Preparing materials
(Normally I newer write disclaimers because I live in Denmark where you cannot sue people if you yourself are being stupid - but in this case, a piece of advice is in its place: You are heating really flamable components here. Always have a fireblanket near the pots and do all work on the groundsheet outside, and well... just don't be stupid, ok?!)
Start by melting the beeswax in a pot. Beeswax is rather flamable so remember to use a waterbath (a larger pot with water with a smaller pot with the wax in). In this way you are less likely to set things on fire. Simultaniously mix the oil and tar in another pot (easier to get mix right if you are not pooring it directly into the wax). Pour the dark mixture into the melted wax and reheat. Note that it takes around 1 hour to melt the wax.
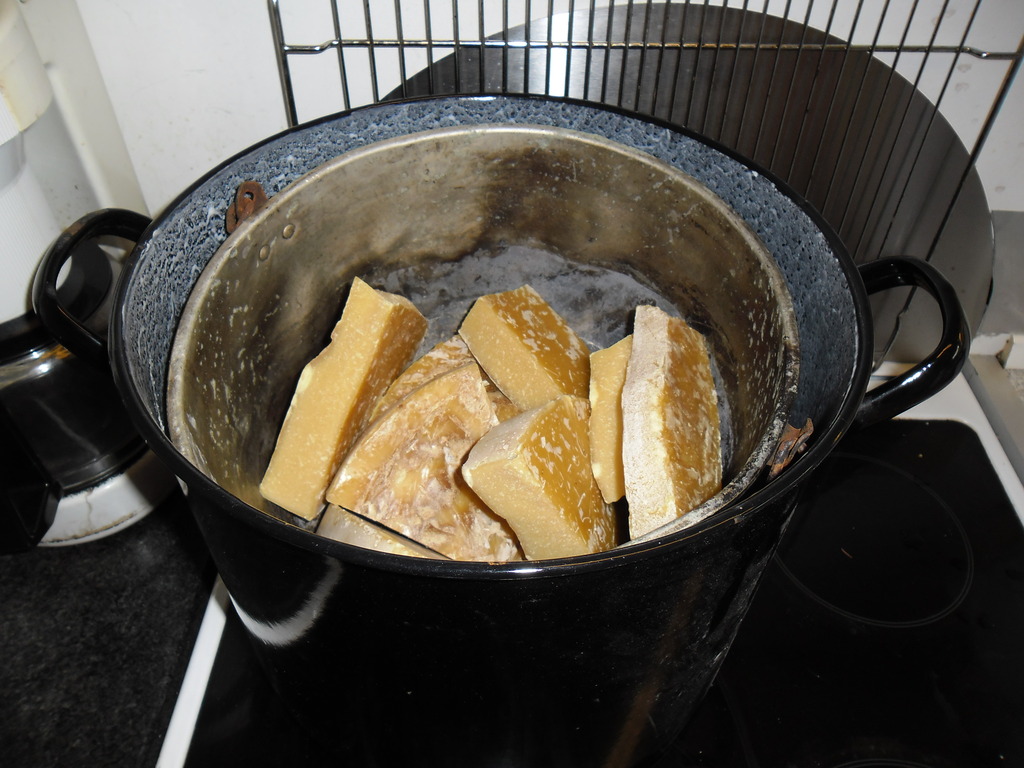 Beeswax heating Beeswax heating |
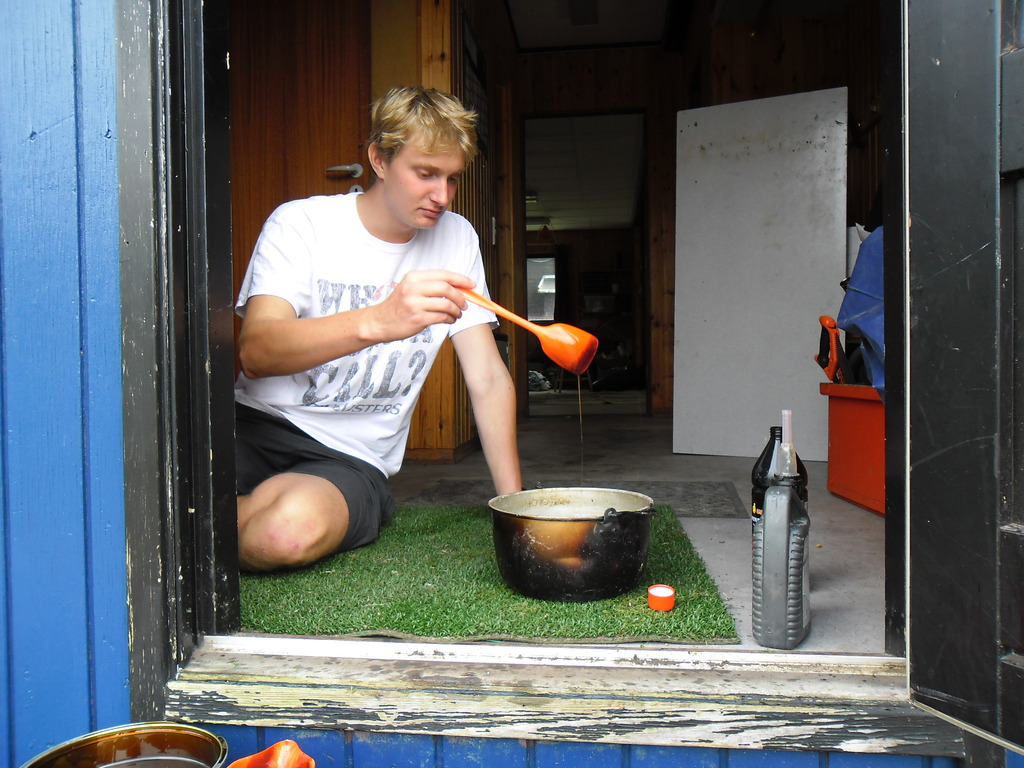 Making the oil-tar solution Making the oil-tar solution |
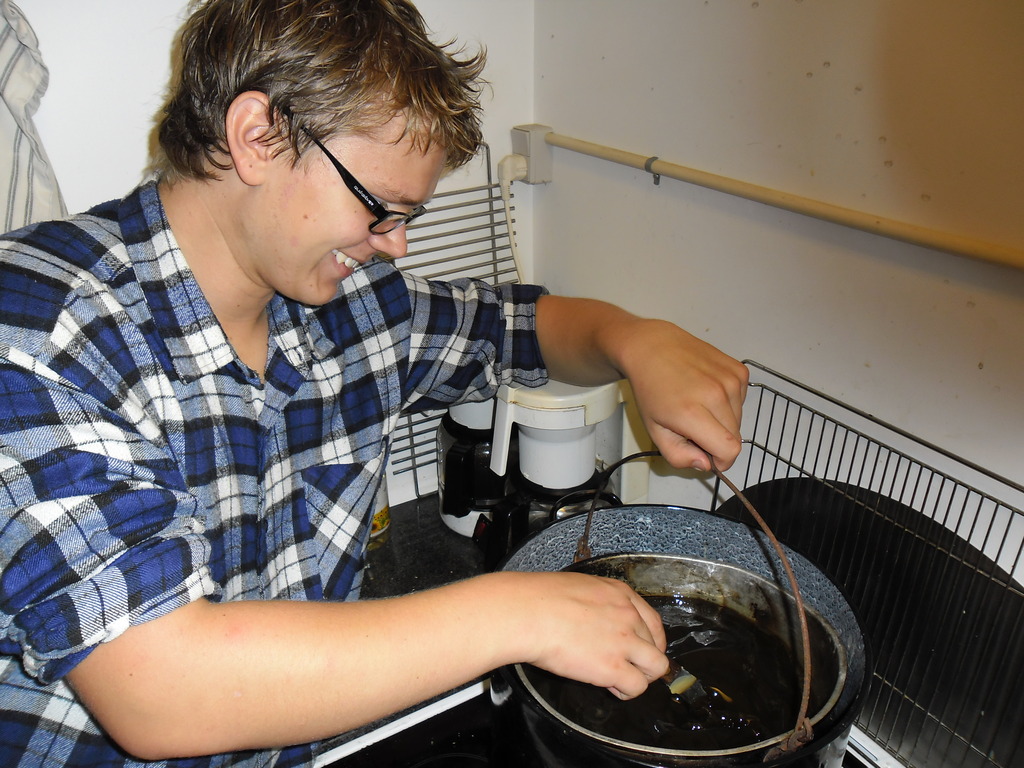 Stirring beeswax and oil Stirring beeswax and oil |
Applying the mixture
This step is ideally done by three persons, and takes around 2.5 hours time. The first person "paints" the mixture on the dry and clean groundsheet. The waxmix dries almost instantly after applying so the other two people follows the first with each their heatgun, warming the mix for long enough to let it seep into the fabric. This is Tedious work, and you can always see spots afterwards where there is not enouh mix or it has not been absorbed by the fabric. It is adviseable to give it a second round where you paint all the places where it have not gotten enough in order to eliminate seepage. Be generous.
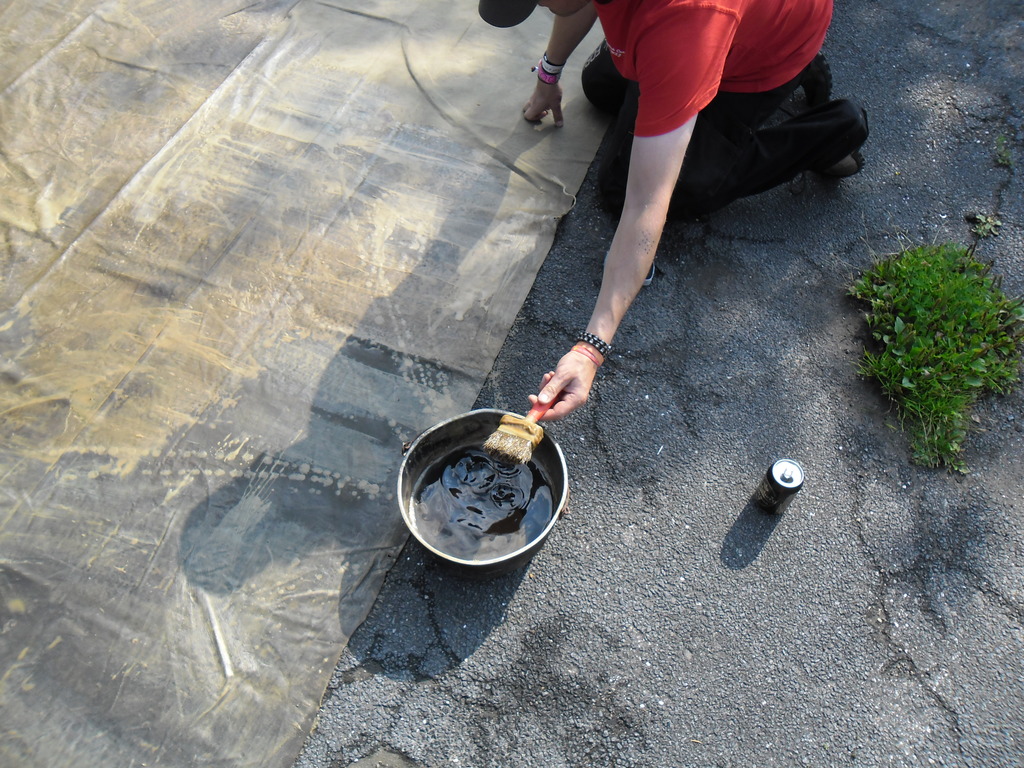 Painting with wax Painting with wax |
 Testing water resistance Testing water resistance |
 Heatgunning Heatgunning |
 Allmost done Allmost done |
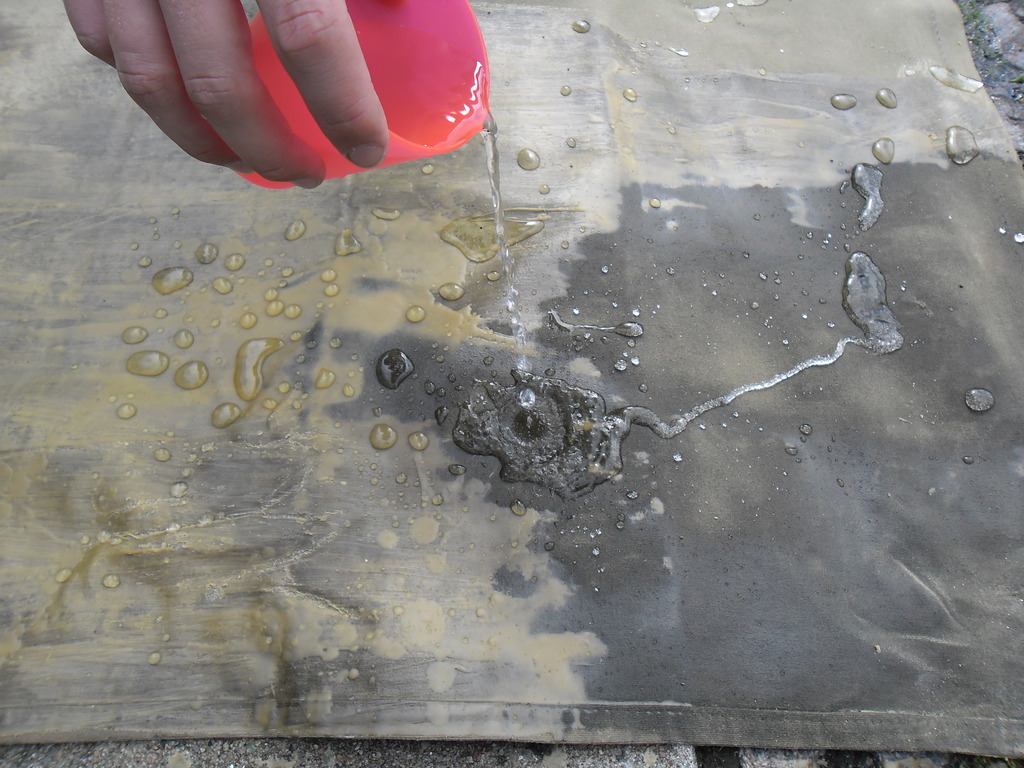
Scraping and redoing
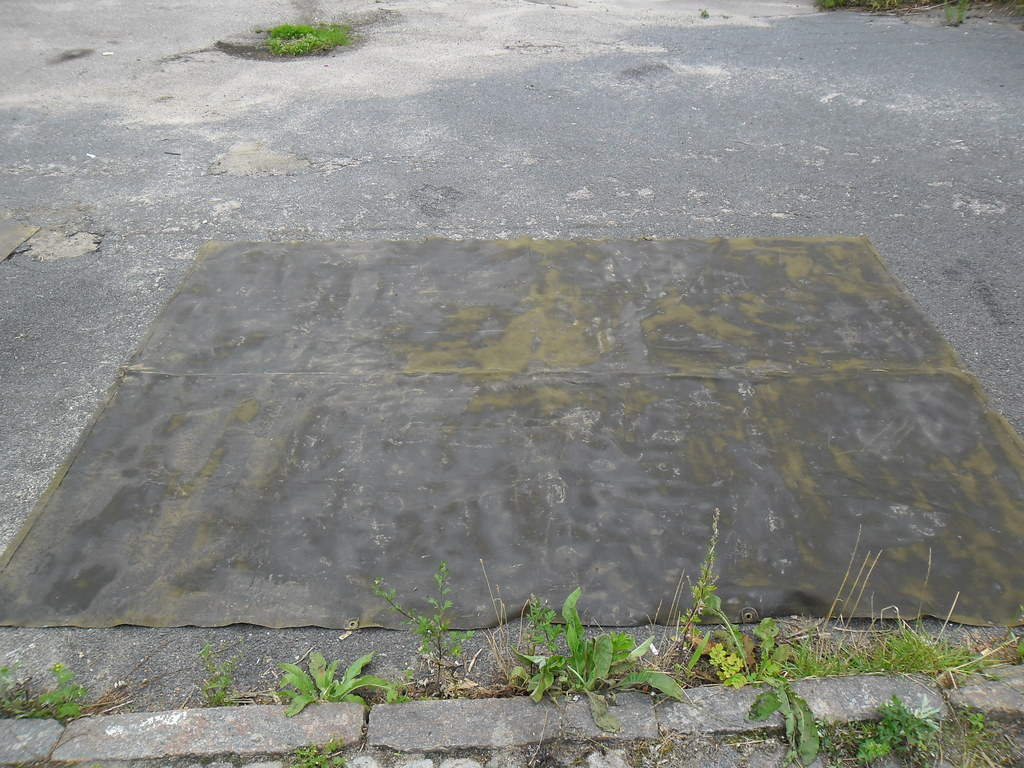
When you have completed applying the mixture let it dry for a few hours and inspect your work. Be warned - you will not be impressed. A low of leftover wax will be on the surface. This will crack easily and weigh you down. ... therefore excess wax should be scraped off. - A credit card works well for this. ... and yes - after this you will have to give it a third tour with the heatgun in order to seal the mix properly within the fibers.
 Excess wax Excess wax |
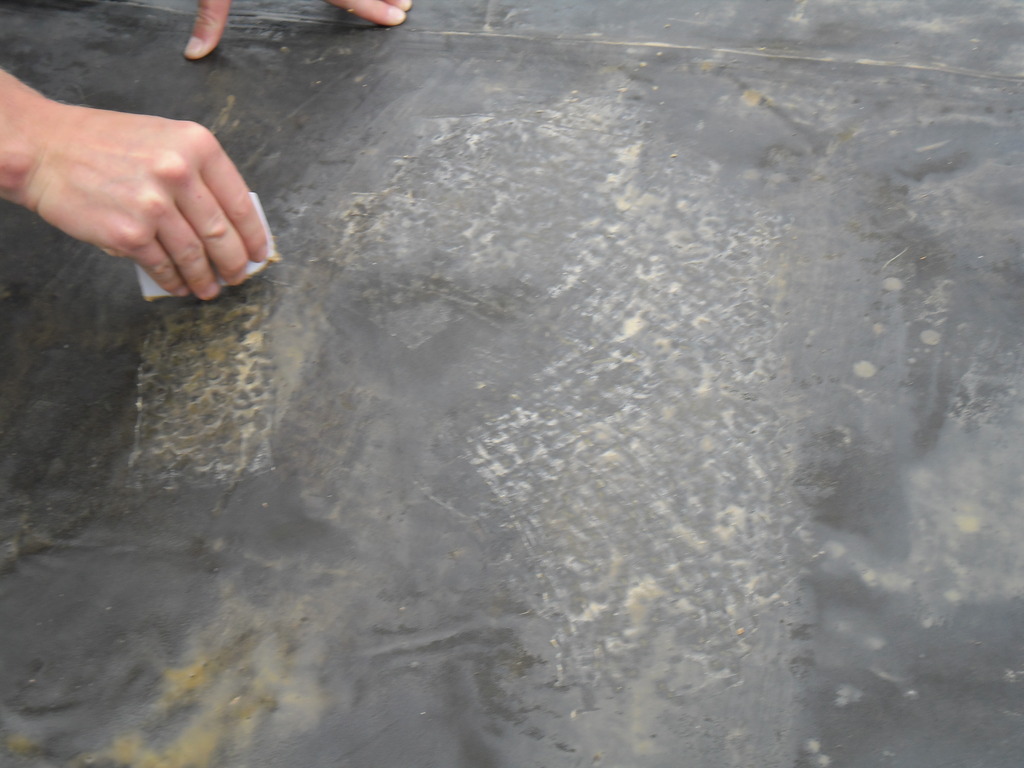 Scrape off excess wax Scrape off excess wax |
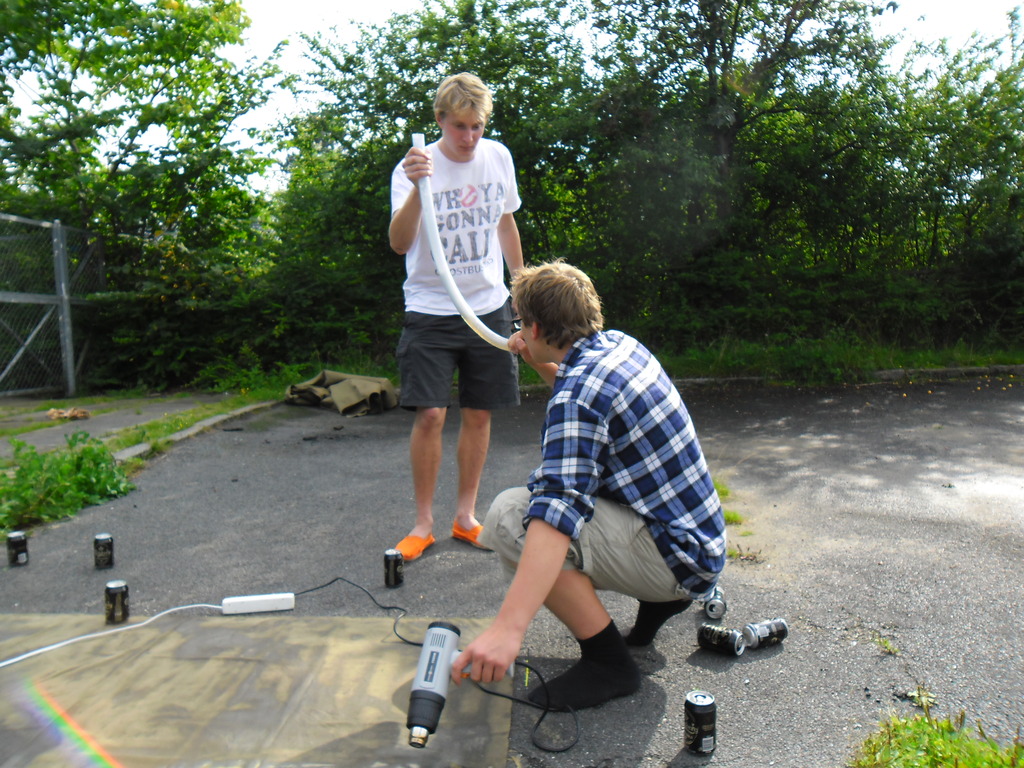
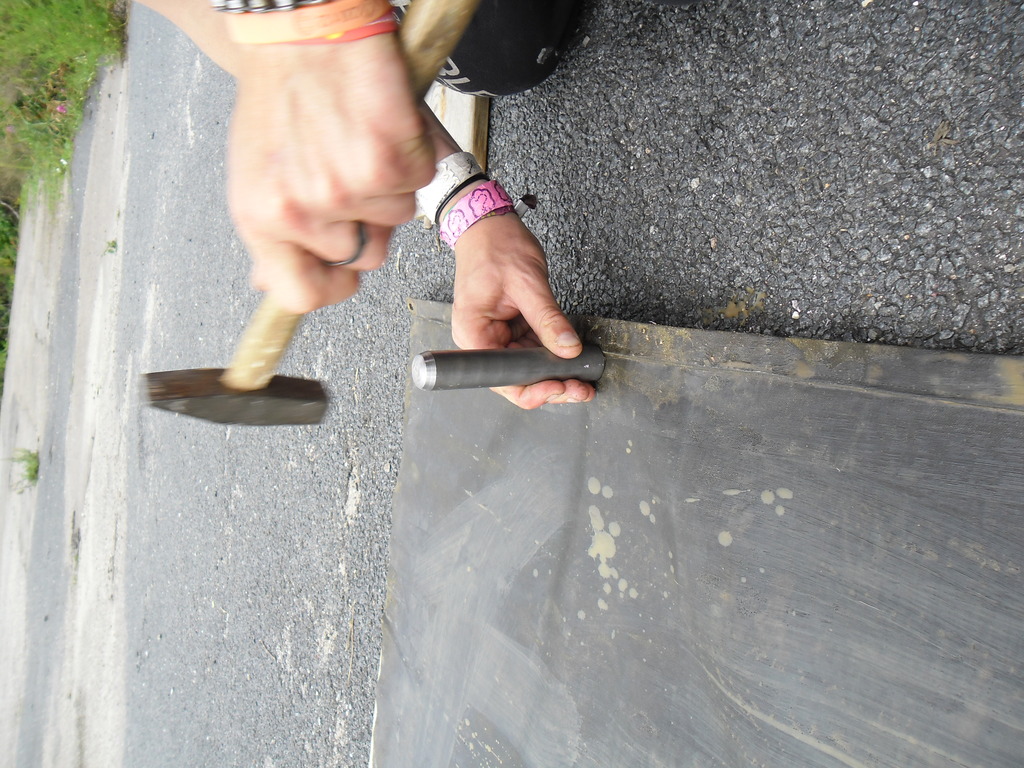
Hammering in the metal rings
If you need the groundsheet as skin for a raft, it is adviseable to hammer add some reinforced holes. They should be inserted with 25-30 cm in between. If there is longer, there will not be enough - shorter and the rings will weigh too much for comfort.
About the riveting, there is not much to say. Use a cut pipe 1mm smaller than the diameter of the metal rings you are applying as the fabric will stretch a tad. Never use plastic rings as they break easily. If possible, place the rings so they are on the enforced edge of the groundsheet.
When making the holes and inserting the rings use a wooden plank underneath the groundsheet for best results.
After riveting, let the ground sheet dry for 48 hours in indoor temperature - beware. It reeks of tar for a few months.
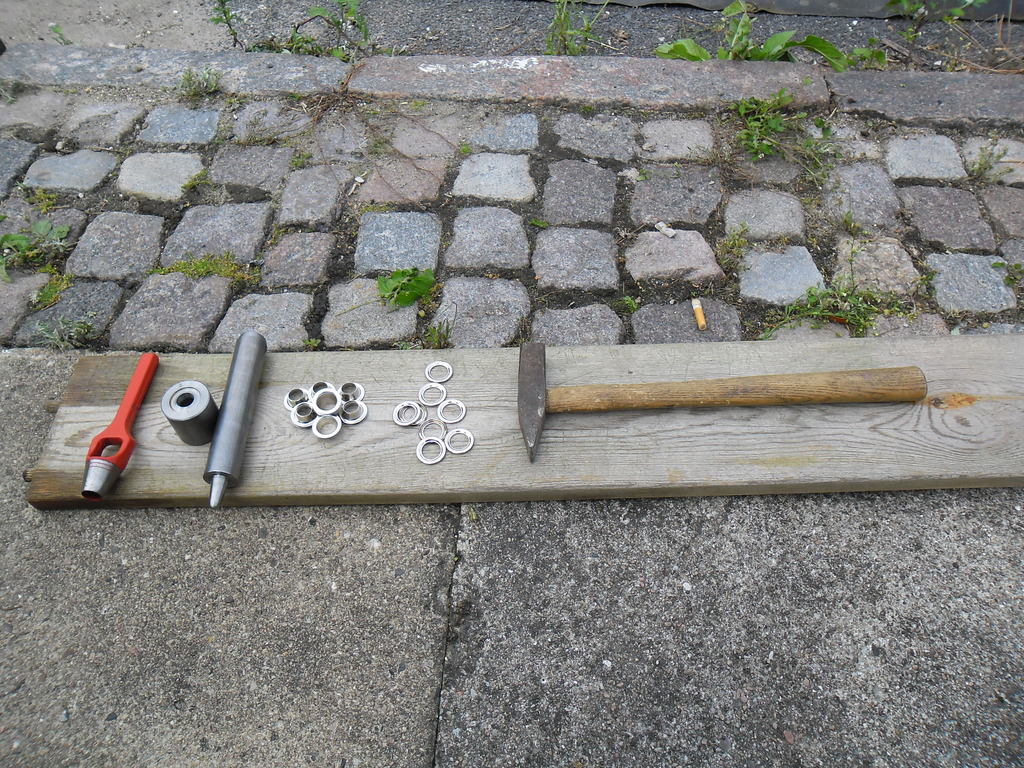 Tools needed Tools needed |
 Hammering Hammering |
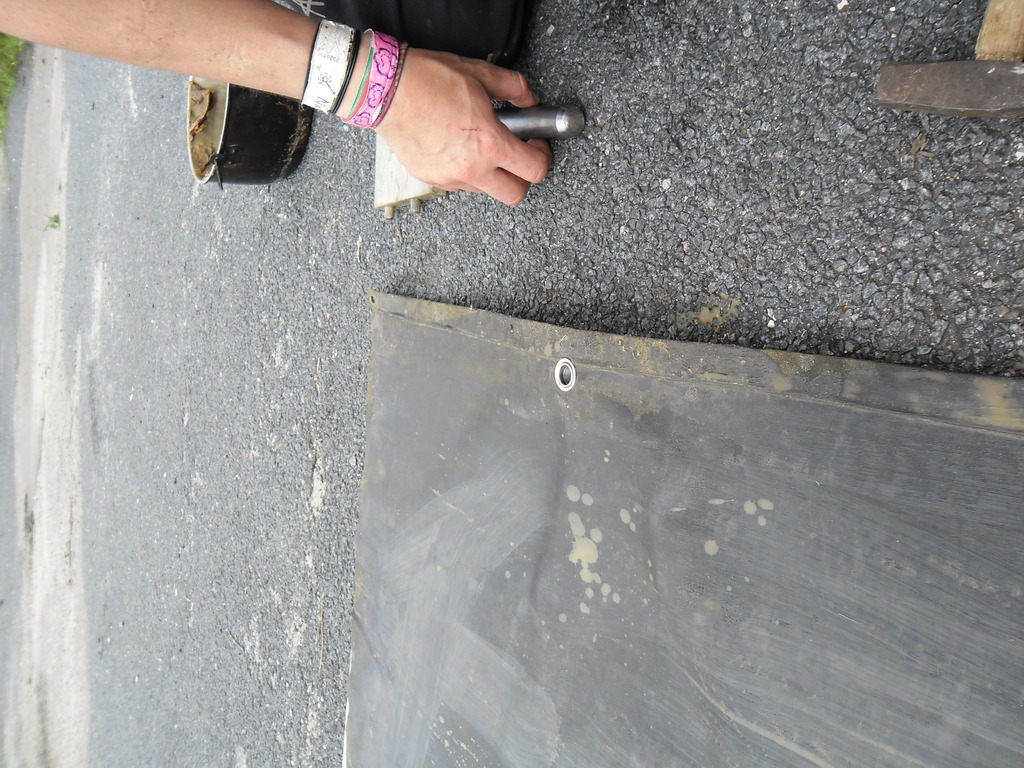 Metal Ring Metal Ring |
Testing and evaluation:
| Project Done |
We did complete the Mill River race on this groundsheet, and it proved to be as close to waterproof as possible. Admitedly we did sink a few times, but that is attributed to the raftdesign and not the groundsheet. I gave the sheet a more thorough test a few days later, filling the sheet with 5 liters of water and hanging it under the ceiling. After 48 hours only a few drops had gone through.
If you want to see how the groundsheet was used to build a boat, go HERE to see how it was used.
A few notes on tools and materials
The price of materials vary widely. Beeswax is horribly expensive if you buy it in a shop. We vere lucky to find a beekeeper that gave us what we needed. Also the paraffin oil is quite pricy so use any other clear easyflowing meneral oil you can find.
The tools itself also vary wildly. We actually paid 200 DKK for the cutpipe in a home depot, later finding out that it costs 75 DKK in other places. The riveting tool used costs around 300 DKK and the metal rings was bought in free weight. You CAN get the metal rings in a pack with 20 and a tool for considerably less, but it looks flimsy.
Both metal rings, riveting tool and cut pipe can be bought for a fair price here: Skindhuset. They might not have all materials on their webpage but does in the shop.